Developer Mode on Android is a powerful feature hidden within the operating system, designed primarily for app developers—but it offers valuable tools for testers, IT professionals, and advanced users as well. By unlocking this mode, you gain access to deep-level system functions such as USB debugging, OEM unlocking, animation scaling, and real-time performance diagnostics. Although these features are tucked away for safety reasons, enabling them allows users to take control of their devices far beyond the standard user settings.
Why Is Android Phone Overheating? Top Reasons & Easy Fixes
A developer compiling Android applications, a tester simulating device behavior, or an enthusiast looking to speed up your phone, Developer Mode opens a door to greater customization, monitoring, and control. But because some features can affect system integrity, it’s essential to follow the right steps and understand the implications before making changes.
What Is Developer Mode on Android?
Developer Mode, also known as Developer Options, is a hidden settings menu in Android that provides a collection of advanced tools primarily intended for software developers. However, the utility of these tools extends far beyond just app development—they can be used by power users, testers, IT professionals, and anyone interested in getting more control over their device.
How to Fix Screen Flickering on Android – Easy & Quick Solutions!
Once activated, Developer Mode grants access to settings that allow users to simulate different conditions for app testing, optimize system performance, inspect running processes, and more.
Some of the most impactful tools include USB debugging for direct communication between a device and a computer, animation control for speeding up UI interactions, and hardware acceleration settings to improve graphics performance.
For users who want to go further, Developer Mode is also the first step toward unlocking the bootloader, rooting the phone, and installing custom ROMs. It essentially opens the doors to both testing and customizing the Android experience at a system level.
Prerequisites Before Enabling Developer Mode
1. Check Android Version Compatibility
Make sure your device is running Android 4.1 or later. Developer Mode was made widely accessible starting from Android Jelly Bean. Although modern Android versions include it by default, the path to reach it may differ between device brands such as Samsung (One UI), Xiaomi (MIUI), Vivo (FuntouchOS), and Oppo (ColorOS). On certain phones, the Build Number field might be buried under a sub-menu, requiring an extra tap or two to locate.
Understanding where the Developer Mode settings are on your particular device ensures a smooth enabling process without confusion. If your phone is running a very old or modified version of Android, the Developer Options menu may not be available at all.
2. Secure the Device with a Lock Screen
A secure lock screen—such as a PIN, password, or pattern—is required to enable Developer Mode. This extra security step ensures that unauthorized users can’t unlock advanced settings that could alter the phone’s operation. If your device doesn’t have any screen lock set up, the system will prompt you to create one before proceeding.
This is a vital safeguard because features like OEM Unlocking or USB Debugging could be misused by someone with physical access to your device, especially if lost or stolen. Setting up a secure lock helps preserve both your privacy and the integrity of your device.
3. Understand the Potential Risks
Before enabling Developer Mode, it’s crucial to understand that many of the settings available within it can have serious effects on system behavior. For instance, turning on USB Debugging can leave your phone vulnerable to data theft if plugged into an unknown or malicious computer. Likewise, enabling OEM Unlocking allows you to unlock the bootloader, but doing so typically wipes all user data and may disable critical security features like Verified Boot.
Other settings, such as adjusting background process limits or forcing GPU rendering, might interfere with how apps normally function and could lead to performance issues or app crashes. Therefore, it’s important to use these features with caution and only after fully understanding what they do.
4. Avoid Using Managed Devices
If your phone is issued by a company, school, or government institution, it may be managed by Mobile Device Management (MDM) software. These systems often enforce policies that disable Developer Options entirely or limit their access. You might not be able to activate Developer Mode unless you remove these restrictions, which is typically not possible without administrative permissions.
If you’re unsure whether your phone is managed, check your settings under Security > Device Management or ask your IT administrator. Attempting to bypass these restrictions could violate usage agreements or even brick the device.
Step-by-Step Guide: How to Enable Developer Mode on Android
Step 1: Open the Settings App
Locate and launch the Settings app, typically represented by a gear icon. It might be pinned to your home screen or inside the app drawer. This app serves as the central hub for all your device’s configurations—from wireless connections to system-level adjustments like enabling Developer Options.
Step 2: Navigate to ‘About Phone’
Scroll down to find About Phone or About Device. On some phones, especially those running newer Android versions, you may have to go to Settings > System > About Phone. This section contains key device information like the model number, Android version, and the Build Number—your gateway to Developer Mode.
Step 3: Locate the ‘Build Number’ Field
Inside the About section, look for Build Number—a unique identifier for the system software installed on your device. On certain devices (like Samsung), you might need to first tap Software Information to find this field. Build Number is not just informational—it’s the trigger you’ll use to unlock Developer Mode.
Step 4: Tap the Build Number Seven Times
Tap the Build Number entry seven times quickly. As you tap, the system will begin counting down with a message like “You are now X steps away from being a developer.” After the seventh tap, you’ll receive a confirmation message like “Developer Mode has been enabled,” indicating success.
This secret sequence is designed to prevent casual users from stumbling into developer settings unintentionally.
Step 5: Enter Lock Screen Credentials
If your phone is protected with a PIN, pattern, or password, the system will now ask you to verify your identity. This security checkpoint ensures that only an authorized user can activate Developer Mode. Enter your credentials to proceed and finalize the activation.
How to Access Developer Options After Enabling It
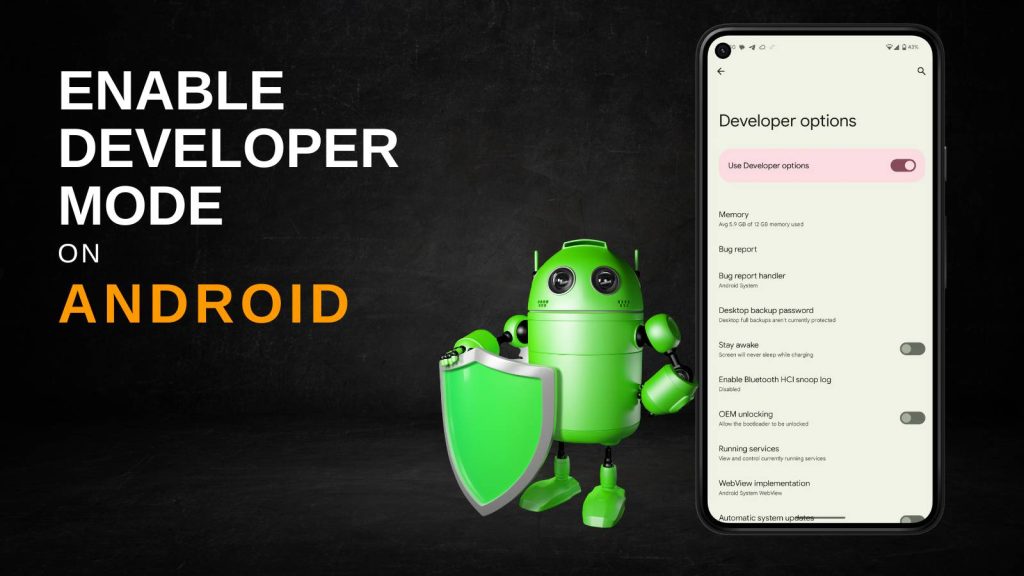
Once Developer Mode is activated, the Developer Options menu will appear in the Settings app. You won’t find it under “About Phone”—instead:
- Open Settings again.
- Scroll down to System (on some devices, it appears under Additional Settings).
- Tap Developer Options to access the advanced configuration tools.
This menu stays visible until it’s disabled or hidden manually. You can revisit it anytime to enable or disable specific developer-related features.
Most Useful Features in Developer Mode
1. USB Debugging
This feature allows your Android device to communicate with your computer using Android Debug Bridge (ADB). It enables developers to push apps, inspect log files, issue commands via terminal, and debug applications in real-time. Even if you’re not a developer, USB Debugging is essential for tools like Titanium Backup, scrcpy (screen mirroring), or recovering data using PC software.
Keep in mind that while this feature is powerful, it should be turned off when not in use to avoid security vulnerabilities.
2. OEM Unlocking
Enabling this option allows the bootloader to be unlocked—a necessary step if you want to root your device or install custom firmware like LineageOS. Once the bootloader is unlocked, you can flash third-party ROMs or recovery tools such as TWRP.
However, this option wipes all your data, voids warranties on many devices, and disables key security features. Only enable OEM Unlocking if you know exactly what you’re doing.
3. Stay Awake While Charging
Activating this setting prevents the screen from turning off while the device is charging. This is useful during app testing or development sessions where you need constant access to the UI. It’s also handy for kiosk setups or long monitoring sessions during system diagnostics.
4. Limit Background Processes
This option allows you to limit how many apps can run in the background simultaneously. It helps conserve RAM, CPU, and battery life, especially on older or less powerful devices. Setting a lower background process limit can improve performance during heavy multitasking but may cause certain background-dependent apps (like music or messaging apps) to misbehave.
5. Animation Scales (Window, Transition, Animator)
These settings control the speed of UI animations across the device. By reducing or disabling the Window Animation Scale, Transition Animation Scale, and Animator Duration Scale, you can make your phone feel significantly faster and more responsive. These settings only affect perception, not real speed, but the effect can make the phone seem snappier in daily use.
6. Show Taps and Pointer Location
This is especially helpful for developers creating tutorials, app demonstrations, or UI testing. Show Taps displays a visual indicator wherever the screen is touched, and Pointer Location overlays crosshairs and touch coordinates, providing granular input tracking. These tools are also useful for diagnosing touchscreen issues or showcasing interactions during screen recordings.
How to Disable or Hide Developer Mode
Option 1: Disable Developer Options Manually
Go to Settings > Developer Options and toggle the switch at the top to Off. This deactivates all developer tools while keeping the menu available for future use. It’s the safest way to temporarily stop using advanced features.
Option 2: Completely Hide Developer Mode
If you want to remove the Developer Options menu altogether:
- Go to Settings > Apps > Settings > Storage
- Tap Clear Data
This will reset all system settings (excluding your personal data) and remove the Developer Options menu from visibility. To use it again, you’ll need to re-enable it by tapping the Build Number seven times.
Is Developer Mode Safe to Use?
Yes, but only when used wisely. Developer Mode offers powerful tools, but some features can drastically alter system behavior or compromise security.
Benefits:
- Access to debugging tools, performance diagnostics, and app testing utilities.
- Ability to optimize user interface speeds and graphics rendering.
- Essential for rooting, flashing ROMs, or performing custom system modifications.
Risks:
- USB Debugging, if left on, can expose data to malicious PCs or charging stations.
- OEM Unlocking wipes the device and makes it vulnerable to boot-level malware.
- Misconfigured performance settings could cause app crashes or sluggish behavior.
Always research each setting before enabling it, and avoid unnecessary changes unless you’re confident in what they do.
Troubleshooting Developer Mode Not Appearing or Working
1. Check You Tapped the Correct Field
Ensure you’ve tapped Build Number, not Android version or another item. Some brands hide this under Software Information.
2. Restart Your Phone
In some cases, you may need to reboot your device for Developer Options to appear.
3. Check for Administrative Restrictions
If Developer Mode doesn’t show up, your device may be managed by an organization. MDM policies can block this feature entirely.
4. Update Your Device
Older or buggy firmware may prevent Developer Mode from appearing. Check for updates under Settings > System > System Update.
If you’re ready to unlock the full potential of your Android phone, enabling Developer Mode is your first step into deeper control and customization.
FAQs
1. What is Developer Mode on Android?
Developer Mode, also known as Developer Options, is a hidden menu in Android devices that provides advanced tools intended for software developers, testers, and power users. It enables features such as USB debugging, animation scaling, background process control, and access to hardware and software diagnostic settings. While primarily meant for development and app testing, general users also use it for customizing device performance and UI behavior.
2. How can I enable Developer Mode on my Android phone?
To enable Developer Mode:
- Open the Settings app.
- Scroll to About Phone (or About Device).
- Tap on Build Number seven times in quick succession.
- If prompted, enter your PIN, password, or pattern.
- A message will appear: “You are now a developer!”
Developer Options will then be visible in the System section of the Settings app.
3. Where can I find the Developer Options menu after enabling it?
Once activated, the Developer Options menu is typically located in:
- Settings > System > Developer Options
On some devices, especially those using custom UIs (like Samsung’s One UI), it may appear directly under the main Settings menu. This menu remains accessible unless disabled or hidden manually.
4. Is it safe to enable Developer Mode on Android?
Yes, enabling Developer Mode is safe as long as you don’t change settings you don’t fully understand. However, features like USB Debugging and OEM Unlocking can pose security risks if misused. It’s recommended to disable Developer Mode or USB Debugging when not in use, especially if you’re connecting to unknown computers or public charging stations.
5. What is USB Debugging, and why is it important?
USB Debugging is a feature within Developer Options that allows communication between your Android device and a computer via the Android Debug Bridge (ADB). It’s essential for:
- App testing and development
- Log file analysis
- Sending terminal commands
- Recovering data or installing custom ROMs
While extremely useful, keeping it on all the time can expose your data to risks, so it should be disabled when not actively needed.
6. Will enabling Developer Mode void my phone’s warranty?
No, enabling Developer Mode alone does not void your warranty.
However, certain actions within Developer Mode—like OEM Unlocking to unlock the bootloader—can void the warranty on many devices. Always check the warranty terms provided by your phone’s manufacturer before proceeding with advanced modifications.
7. Can I disable Developer Mode after turning it on?
Yes. You can disable Developer Mode in two ways:
- Turn it off by toggling the switch at the top of the Developer Options menu.
- Remove it entirely by clearing data from the Settings app:
Go to Settings > Apps > Settings > Storage > Clear Data.
This will hide the Developer Options menu until it’s re-enabled.
8. What are the most useful features in Developer Mode for regular users?
Popular features used by non-developers include:
- Animation scale adjustment – to speed up interface response
- Limit background processes – to improve performance and battery life
- Stay awake while charging – to keep the screen on during tests or presentations
- Show taps – useful for screen recording and visual feedback
These features can enhance your phone’s usability without requiring deep technical knowledge.
9. Why can’t I see the Build Number on my device?
On some Android devices (especially Samsung, Xiaomi, Oppo), the Build Number is hidden under a sub-menu like Software Information inside the About Phone section. Navigate as follows:
- Settings > About Phone > Software Information > Build Number
If it’s still not visible, your device may have been restricted by an enterprise or school administrator.
10. What should I do if Developer Mode is not working or showing up?
Try these troubleshooting steps:
- Make sure you tapped the Build Number exactly seven times
- Restart your device after activation
- Update your Android to the latest version
- Check for enterprise restrictions or MDM policies on managed devices
If all else fails, resetting your settings or contacting device support may help.