Dealing with an iPhone stuck in recovery mode can be frustrating, especially when you’re unsure how to fix it. Whether it happened during a software update, restore process, or due to an unexpected glitch, getting your iPhone back to normal is a top priority.
There are several effective solutions to exit iPhone recovery mode without losing data. From using iTunes or Finder to third-party tools and manual fixes, this guide covers everything you need to restore your device quickly and prevent future issues.
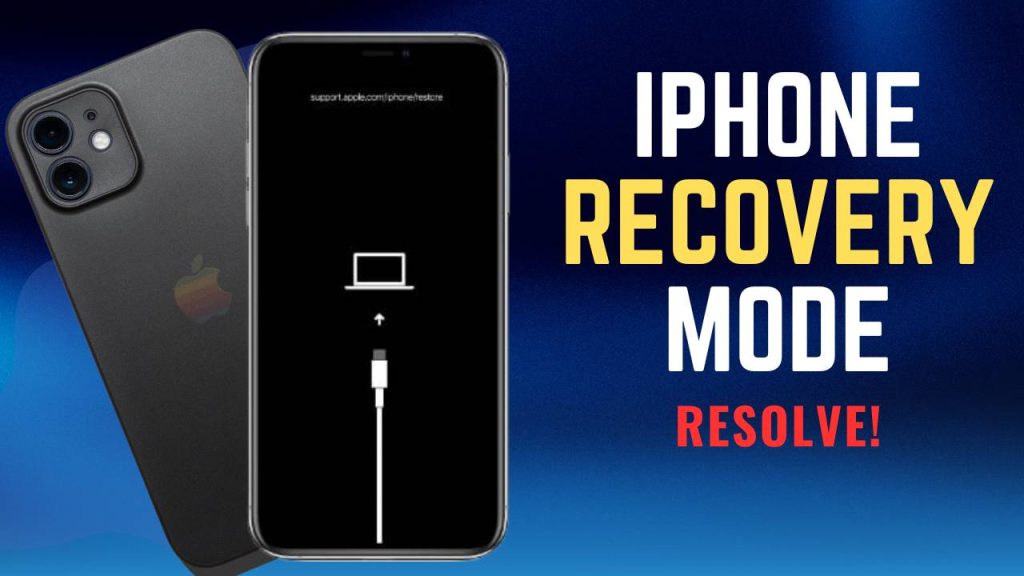
What Is iPhone Recovery Mode and Why Is Your Device Stuck?
iPhone recovery mode is a built-in troubleshooting feature designed to help users restore or update their device when standard methods fail. It acts as a bridge between the iPhone’s firmware and iTunes (or Finder on macOS), allowing users to reinstall iOS, fix system errors, or resolve software-related issues. This mode is particularly useful when an iPhone becomes unresponsive, experiences a failed update, or encounters a serious software glitch that prevents normal operation.
When an iPhone enters recovery mode, the screen typically displays the “Connect to Computer” or iTunes logo. In this state, the device cannot be used until it is either restored or updated via iTunes or Finder. While recovery mode is meant to help fix issues, it can sometimes become a problem itself, leaving users stuck without a clear way to exit.
Why My iPhone Touch Screen Not Working? Common Causes and Fixes
Common Reasons Why iPhones Get Stuck in Recovery Mode
Many users encounter the issue of their device being stuck in recovery mode while trying to update, restore, or fix software problems. While this feature is intended to help resolve system errors, certain factors can prevent the iPhone from booting normally. Understanding these causes can help prevent the issue and determine the best way to fix it.
1. Interrupted iOS Update or Restore Process
A failed or incomplete software update is one of the most frequent reasons a device remains in recovery mode. This can occur due to power loss, an unstable internet connection, or iTunes (or Finder) crashing during the installation. When the update does not finish properly, the system may be unable to proceed, leaving the device stuck.
2. Corrupt or Incompatible Firmware
During an update or restoration, the iPhone downloads and installs new firmware. If this file is corrupt, incomplete, or not suitable for the specific model, it can lead to boot failures. This is especially common when attempting to downgrade iOS or install beta versions that may not be fully stable.
3. Failed Jailbreak Attempt
Jailbreaking allows users to bypass Apple’s restrictions, but it also introduces risks. If the jailbreak process is unsuccessful or interferes with system files, the phone may fail to start properly and enter recovery mode as a safety measure. Some tweaks or modifications can also lead to instability, triggering boot issues.
4. Hardware Damage or Internal Issues
While software failures are the usual cause, physical damage can also be responsible. Drops, water exposure, or failing components like the battery or logic board may prevent the device from booting. If internal hardware malfunctions, the phone might default to recovery mode as it struggles to function properly.
5. Use of Unauthorized Software
Many third-party repair tools claim to fix iPhone errors, but some can alter system files in a way that causes more harm than good. Unauthorized firmware installations or incompatible software may interfere with iOS processes, resulting in a device that remains stuck in recovery mode.
6. Accidental Activation
Some users unintentionally activate this mode by pressing the wrong button combination during a restart. This can happen when trying to force restart or enter DFU (Device Firmware Update) mode. If the restore or update isn’t completed afterward, the phone may remain stuck.
7. Insufficient Storage During Update
Installing iOS updates requires free storage space. If a device lacks enough room for the new software, the installation may fail, forcing it into recovery mode. Without adequate space to complete the process, the system is left in limbo.
8. Security Software or System Conflicts
Sometimes, security settings—such as outdated antivirus software on a connected computer—can interfere with the restoration or update process. Malware infections or conflicting system settings may also prevent the phone from successfully completing an update, triggering a recovery mode loop.
9. Battery or Power Supply Issues
A weak or failing battery can cause power disruptions during an update, leading to unexpected shutdowns. If the device turns off mid-update, it may not be able to reboot normally, resulting in recovery mode activation.
10. Issues with iTunes or Finder
If the software used to restore or update the device is outdated or buggy, it can contribute to an incomplete installation. Connection errors or software malfunctions in iTunes (on Windows or older macOS versions) or Finder (on newer macOS versions) may prevent the phone from exiting recovery mode successfully.
How to Enter Recovery Mode (iPhone 6 to iPhone 15)
The process to enter iPhone recovery mode varies slightly depending on your iPhone model. Follow the right steps based on your device:
iPhone 8, iPhone X to iPhone 15:
- Connect your iPhone to your computer (Mac or PC).
- Quickly press and release the Volume Up button.
- Quickly press and release the Volume Down button.
- Press and hold the Side button until you see the recovery mode screen (iTunes or Mac icon with a cable).
iPhone 7 and 7 Plus:
- Connect to your computer.
- Press and hold the Volume Down and Side buttons at the same time.
- Keep holding until you see the recovery mode screen.
iPhone 6s or earlier:
- Connect to your computer.
- Press and hold both the Home and Top/Side buttons together.
- Don’t release until you see the recovery mode screen.
Once in recovery mode, iTunes (on PC or macOS Mojave and earlier) or Finder (on macOS Catalina and later) will detect your device and offer to Update or Restore it.
How to Exit Recovery Mode in iPhone
If you entered recovery mode by accident, or your iPhone is stuck there and you want to get out—try these steps first before resorting to a full restore:
Method 1: Use Button Combinations
Depending on your model, try a force restart to exit recovery mode:
- iPhone 8 to iPhone 15: Press and release Volume Up → Press and release Volume Down → Hold Side button until the Apple logo appears.
- iPhone 7 series: Hold Volume Down + Side button together until the Apple logo appears.
- iPhone 6s or earlier: Hold Home + Side button until you see the Apple logo.
Method 2: Use iTunes or Finder
- When prompted to Update or Restore, choose Update to reinstall iOS without erasing data.
- If Update fails, use Restore (this will erase your data unless you have a backup).
Method 3: Use a Professional Tool (Optional)
Third-party tools like ReiBoot, iMyFone Fixppo, or Dr.Fone – Repair can help you exit recovery mode in 1 click—without erasing data.
How to Fix iPhone Stuck in Recovery Mode Without Data Loss
iPhone is stuck in Recovery Mode, you might be worried about losing your data. The good news is that there are ways to fix this issue without erasing your files. Below are some effective methods to get your iPhone back to normal.
Method 1: Force Restart Your iPhone (Quickest Fix)
A force restart is often the simplest way to fix an iPhone stuck in recovery mode. This method does not delete any data and forces your iPhone to reboot properly.
Steps Based on Your iPhone Model:
For iPhone 8, iPhone X, XS, 11, 12, 13, 14, and 15 Series:
- Press and quickly release the Volume Up button.
- Press and quickly release the Volume Down button.
- Press and hold the Side (Power) button until the Apple logo appears.
- Release the button, and your iPhone should boot up normally.
For iPhone 7 and 7 Plus:
- Press and hold the Volume Down and Power (Side) button at the same time.
- Keep holding both buttons for about 10 seconds until the Apple logo appears.
- Release the buttons and wait for your iPhone to restart.
For iPhone 6s, SE (1st Gen), and Earlier Models:
- Press and hold the Home and Power (Side/Top) button simultaneously.
- Keep holding both buttons for about 10-15 seconds until you see the Apple logo.
- Release the buttons and allow your iPhone to restart.
If the force restart does not work, proceed to the next method.
Method 2: Update iPhone Using iTunes or Finder (No Data Loss)
If a force restart doesn’t work, you can try updating your iPhone using iTunes (on Windows or macOS Mojave and earlier) or Finder (on macOS Catalina and later). This method does not erase your data.
Steps to Update Using iTunes/Finder:
- Connect your iPhone to a computer using a USB cable.
- Open iTunes (on Windows/macOS Mojave or earlier) or Finder (on macOS Catalina and later).
- iTunes/Finder will detect your iPhone in recovery mode and show a pop-up.
- Click on Update (NOT Restore). This will install the latest iOS version without deleting your data.
- Wait for the update process to complete.
- Once the update is done, your iPhone should restart normally.
If your iPhone is still stuck, move to the next method.
Method 3: Use a Professional iOS Repair Tool (Guaranteed No Data Loss)
If iTunes or Finder cannot fix your iPhone, you can use a professional iOS system repair tool. These tools are designed to fix system errors without deleting data. Some of the best ones include:
- Tenorshare ReiBoot
- iMyFone Fixppo
- Dr.Fone – Repair (iOS)
How to Use an iOS Repair Tool:
- Download and install one of the iOS repair tools on your computer.
- Connect your iPhone via a USB cable and open the tool.
- Select Standard Repair Mode (or a similar option that ensures no data loss).
- The tool will prompt you to download the latest iOS firmware.
- After downloading, click Start Repair and wait for the process to complete.
- Your iPhone will restart normally without losing data.
This is the safest method to fix an iPhone stuck in recovery mode without risking data loss.
Method 4: Use DFU Mode (Last Resort – Risk of Data Loss)
If none of the previous methods work, you can try DFU (Device Firmware Update) mode. This method reinstalls iOS, but there is a risk of data loss if the update fails.
Steps to Enter DFU Mode:
1. Connect your iPhone to a computer and open iTunes/Finder.
2. Follow these steps based on your iPhone model:
For iPhone 8 and Later (iPhone 15, 14, 13, etc.):
- Quickly press and release Volume Up → Quickly press and release Volume Down.
- Hold the Side (Power) button until the screen turns black.
- Press and hold Volume Down while still holding the Power button for 5 seconds.
- Release Power but keep holding Volume Down for another 10 seconds.
For iPhone 7 and 7 Plus:
- Hold down the Power and Volume Down buttons for 8 seconds.
- Release the Power button but keep holding Volume Down for 10 more seconds.
For iPhone 6s, SE (1st Gen), and Earlier:
- Hold down the Power and Home buttons for 8 seconds.
- Release the Power button but keep holding Home for 10 more seconds.
If your screen stays black and iTunes/Finder detects your iPhone, click Update (NOT Restore).
Use this method only if the previous ones fail, as it has a slight risk of data loss.
Method 5: Contact Apple Support or Visit a Repair Center
If none of these methods work, your iPhone might have a hardware issue. In this case, you should:
- Visit an Apple Store or Authorized Repair Center for professional assistance.
- If your iPhone is under warranty or covered by AppleCare+, you may get a free repair or replacement.
- Apple technicians can diagnose and fix the issue while attempting to keep your data intact.
Using iTunes or Finder to Restore iPhone from Recovery Mode
If your iPhone is stuck in recovery mode and you need to restore it, iTunes (for Windows and macOS Mojave or earlier) or Finder (for macOS Catalina and later) can help. This process will erase all data on your device and install the latest iOS version. While this is an effective solution, it is important to back up your data if possible before proceeding, as restoring your iPhone will wipe all your files, settings, and apps.
In this guide, I will explain how to restore your iPhone from recovery mode using iTunes or Finder, step by step.
Step 1: Prepare Your Computer and iPhone
Before starting the restoration process, ensure that:
- Your computer has the latest version of iTunes (if using Windows or macOS Mojave and earlier).
- Your Mac is updated to the latest macOS version (if using Finder on macOS Catalina or later).
- Your iPhone is fully charged or has at least 50% battery to avoid power interruptions during restoration.
- You have a stable internet connection to download the latest iOS version.
- A compatible Lightning or USB-C cable is available to connect your iPhone to the computer.
Step 2: Connect Your iPhone to the Computer
- Use a USB cable to connect your iPhone to your computer.
- If you are using Windows or macOS Mojave or earlier, launch iTunes.
- If you are using macOS Catalina or later, open Finder.
- If your iPhone is in recovery mode, a message will appear saying:
“There is a problem with the iPhone that requires it to be updated or restored.”
Step 3: Choose ‘Restore’ to Erase and Reinstall iOS
At this stage, you will see two options:
- Update: This option attempts to install the latest iOS version without erasing your data.
- Restore: This option erases your iPhone completely and installs a fresh version of iOS.
Since you are looking to restore the iPhone, follow these steps:
- Click Restore instead of Update.
- iTunes or Finder will confirm that all data will be erased. Click Restore and Update to proceed.
- The software will begin downloading the latest iOS version from Apple’s servers.
- This process may take several minutes depending on your internet speed.
- Once the download is complete, iTunes or Finder will extract the software and begin restoring your iPhone.
Step 4: Wait for the Restore Process to Complete
- The restoration process will take about 10-30 minutes, depending on your device model and internet speed.
- Your iPhone will restart multiple times during the process.
- Do not disconnect your iPhone from the computer until the restoration is fully completed.
Once the process is finished, you will see the Hello screen on your iPhone, indicating that the restore was successful.
Step 5: Set Up Your iPhone as New or Restore from Backup
After restoring your iPhone, you have two options:
Set Up as New iPhone:
- If you do not have a backup or want a fresh start, follow the on-screen instructions to set up your iPhone.
Restore from Backup (Recommended if you have a backup):
- If you previously backed up your data using iTunes, Finder, or iCloud, you can restore your backup.
- Follow these steps:
- On the Apps & Data screen, select Restore from iCloud Backup or Restore from Mac/PC.
- Choose your most recent backup and wait for the restoration to complete.
What to Do If the Restore Process Fails?
If iTunes or Finder fails to restore your iPhone, try the following:
1. Ensure Your iTunes or macOS Is Up to Date
- Go to Help > Check for Updates in iTunes (Windows).
- On a Mac, go to System Settings > Software Update to install the latest macOS version.
2. Try a Different USB Cable or Port
A faulty Lightning or USB-C cable can cause restoration failures. Try using an Apple-certified cable and switch USB ports.
3. Use DFU (Device Firmware Update) Mode
- DFU Mode is a deeper restore method that can fix severe software issues.
- Unlike standard recovery mode, DFU mode completely erases and reinstalls iOS.
4. Use a Third-Party iOS Repair Tool
If iTunes or Finder still fails to restore your iPhone, consider using a professional repair tool like:
- Tenorshare ReiBoot
- iMyFone Fixppo
- Dr.Fone – Repair (iOS)
These tools can fix recovery mode issues without requiring iTunes.
Best Third-Party Tools to Fix iPhone Recovery Mode Issues
Getting stuck in Recovery Mode is a common issue faced by iPhone users, especially during iOS updates, software crashes, or system glitches. While Apple’s official solutions like iTunes or Finder can help, they often require restoring the device, which results in data loss. Fortunately, third-party tools provide a better way to fix this issue without erasing your data. These tools allow you to exit Recovery Mode safely and even repair various iOS-related issues without requiring technical expertise.
Below, I have listed the best third-party tools to fix iPhone Recovery Mode issues, explaining their features, advantages, and how they work in detail.
1. Tenorshare ReiBoot
Tenorshare ReiBoot is one of the most popular iOS repair tools available today. It provides a one-click solution to exit Recovery Mode and fix over 150 iOS-related problems, including stuck Apple logo, black screen, and boot loops. This tool is designed to be user-friendly and does not require complex technical steps, making it an ideal choice for beginners.
Key Features
- One-Click Exit from Recovery Mode: Allows users to exit Recovery Mode instantly without using iTunes.
- Standard Repair Mode: Fixes common iOS issues like black screens, stuck Apple logos, and update failures without erasing data.
- Deep Repair Mode: Repairs severe system issues, but this may erase all data.
- Compatible with All iOS Versions & Devices: Works on iOS 17 and supports all iPhone models, including the latest releases.
- User-Friendly Interface: Simple design that makes troubleshooting easy for non-technical users.
Pros
✔ Exits Recovery Mode in seconds.
✔ Fixes multiple iOS issues without data loss.
✔ No advanced technical knowledge required.
✔ Supports both Windows and macOS.
Cons
✖ The free version only allows exiting Recovery Mode, while advanced features require a paid version.
✖ Deep repair mode erases data, so users must back up their data before using it.
2. iMyFone Fixppo
iMyFone Fixppo is another excellent tool that can fix iPhone stuck in Recovery Mode and other iOS system problems without causing data loss. It offers two repair modes, making it a great option for users who need a balance between easy troubleshooting and deep system repair.
Key Features
- Exit Recovery Mode with One Click: Quickly removes your iPhone from Recovery Mode without data loss.
- Standard Mode: Repairs iOS issues like black screens, frozen screens, and boot loops without erasing data.
- Advanced Mode: Fixes severe system problems but requires a complete device reset.
- Downgrade iOS without Jailbreaking: Allows users to downgrade iOS without relying on iTunes.
- Wide Compatibility: Works with iOS 17 and supports all iPhone, iPad, and iPod Touch models.
Pros
✔ Provides multiple repair options.
✔ Standard Mode prevents data loss.
✔ Supports iOS downgrades without jailbreaking.
✔ Works on both Windows and macOS.
Cons
✖ The free version only offers limited functionality.
✖ Advanced Mode erases all data, requiring a backup before use.
3. Dr.Fone – Repair (by Wondershare)
Dr.Fone – Repair is an all-in-one iOS system repair tool that helps users fix Recovery Mode issues and other iPhone problems without technical knowledge. It is known for its high success rate and ability to fix over 50 common iOS problems.
Key Features
- Instant Exit from Recovery Mode: Quickly removes your iPhone from Recovery Mode without requiring iTunes.
- Fixes Common iOS Issues: Repairs problems like boot loops, black screens, frozen screens, and failed updates.
- Two Repair Modes:
Standard Mode (fixes common issues without data loss).
Advanced Mode (resolves complex system failures but erases data).
- Data Backup Feature: Allows users to back up data before attempting repairs.
- Compatible with Latest iOS Versions: Works with iOS 17 and all recent iPhone models.
Pros
✔ Offers multiple repair modes for different levels of system issues.
✔ Allows data backup before repairs.
✔ Simple and intuitive interface for easy use.
✔ Compatible with both Windows and macOS.
Cons
✖ The free version has limited repair capabilities.
✖ Advanced Mode erases all data.
4. Joyoshare UltFix
Joyoshare UltFix is a lightweight but powerful iOS repair tool that provides a quick way to exit Recovery Mode and fix other iOS system problems without erasing data. It is best suited for users who need a straightforward and effective solution.
Key Features
- One-Click Exit Recovery Mode: Exits Recovery Mode without using iTunes or Finder.
- Standard & Advanced Repair Modes:
Standard Mode fixes common issues like boot loops and frozen screens without data loss.
Advanced Mode resolves severe system errors but erases all data.
- Supports Over 30 iOS Issues: Fixes black screens, update failures, white Apple logo, and more.
- Wide Compatibility: Supports iOS 17 and earlier versions on all iPhone models.
Pros
✔ Fast and effective recovery process.
✔ No data loss in Standard Mode.
✔ Simple and user-friendly interface.
✔ Works on both Windows and macOS.
Cons
✖ Free version has limited repair capabilities.
✖ Advanced Mode erases data, so backups are recommended.
5. TunesKit iOS System Recovery
TunesKit iOS System Recovery is an excellent tool for fixing iPhone Recovery Mode issues and other iOS system glitches. It is designed for users looking for a fast and reliable solution without using iTunes.
Key Features
- One-Click Exit Recovery Mode: Quickly removes your iPhone from Recovery Mode without requiring iTunes.
- Two Repair Modes:
Standard Mode (fixes common issues without data loss).
Advanced Mode (repairs serious issues but may erase data).
- Fixes Over 50+ iOS Problems: Includes stuck Apple logo, frozen screen, and boot loops.
- Compatible with Latest iOS Versions: Supports iOS 17 and all iPhone models.
Pros
✔ Safe repair process with Standard Mode.
✔ Works on various iOS system issues beyond Recovery Mode.
✔ Compatible with both Windows and macOS.
Cons
✖ Free version has limited features.
✖ Advanced repairs may erase data.
iPhone Recovery Mode vs. DFU Mode: What’s the Difference?
| Feature | Recovery Mode 🛠 | DFU Mode 🔧 |
|---|---|---|
| Bootloader Loads? | ✅ Yes | ❌ No |
| Screen Display | Shows iTunes/Finder logo | Black screen (No display) |
| Can Update iOS? | ✅ Yes (Keeps data if updating) | ❌ No (Only restores iOS) |
| Can Restore iPhone? | ✅ Yes (Restores iOS, erases data) | ✅ Yes (Full system restore) |
| Used for Minor Issues? | ✅ Yes (Fixes update failures, boot loops) | ❌ No |
| Used for Major Issues? | ❌ No | ✅ Yes (Fixes firmware corruption, unresponsive devices) |
| Bypasses Bootloader? | ❌ No | ✅ Yes (Direct communication with iTunes/Finder) |
| Allows Downgrading iOS? | ❌ No | ✅ Yes (If Apple is still signing the older version) |
| Used for Jailbroken iPhones? | ❌ No | ✅ Yes (For restoring or removing jailbreak) |
| Requires Computer? | ✅ Yes (iTunes/Finder needed) | ✅ Yes (iTunes/Finder needed) |
Preventing Future iPhone Recovery Mode Issues: Tips & Tricks
iPhone recovery mode can be a helpful troubleshooting tool, but getting stuck in it can be frustrating. To avoid this issue in the future, it’s important to take proactive measures to maintain your iPhone’s stability and prevent software or hardware problems that could lead to recovery mode loops.
Below are some essential tips and tricks to keep your device running smoothly and avoid unexpected recovery mode issues.
1. Keep Your iOS Updated Regularly
Apple frequently releases software updates that fix bugs, improve performance, and enhance security. Running an outdated iOS version increases the risk of glitches and system failures that can force your device into recovery mode.
- Always update your iPhone to the latest iOS version by going to Settings > General > Software Update.
- If updating wirelessly (OTA), ensure your device has enough battery and a stable internet connection to prevent interruptions.
- If updating via iTunes or Finder, use a certified Apple cable and a computer with enough storage to complete the process.
2. Maintain Sufficient Storage Space
Low storage space can cause iOS updates to fail or prevent system functions from working properly, leading to recovery mode issues.
- Regularly delete unused apps, old messages, and unnecessary files to free up space.
- Enable Optimize iPhone Storage in Settings to automatically manage storage.
- Use cloud storage options like iCloud or Google Drive for photos, videos, and large files to avoid storage overload.
3. Avoid Interrupting iOS Updates & Restores
Interrupting an update or restore process is one of the most common causes of iPhones getting stuck in recovery mode.
- Always keep your iPhone plugged in during an update to prevent shutdown due to low battery.
- Ensure a stable internet connection if updating wirelessly to avoid download failures.
- If updating via iTunes or Finder, avoid disconnecting your iPhone or closing the software until the process is fully complete.
4. Use Apple-Certified Accessories & Cables
Faulty or non-certified charging cables and adapters can cause power fluctuations, which may lead to incomplete updates and system errors.
- Always use Apple-certified Lightning cables and power adapters.
- Avoid cheap third-party accessories that could cause power surges or unstable connections.
- If your charging port is dirty or damaged, clean it carefully using a soft brush or compressed air to ensure a stable connection.
5. Avoid Unstable or Corrupt Third-Party Software
Downloading unverified apps, installing unauthorized firmware, or using unreliable system repair tools can introduce malware or cause system conflicts.
- Only download apps from the App Store and avoid sideloading apps from unknown sources.
- If using third-party tools for troubleshooting, choose reputable ones like ReiBoot, iMyFone Fixppo, or Dr.Fone Repair.
- Be cautious when modifying your iPhone’s system settings, especially if using advanced tools like jailbreaking software.
6. Monitor Battery Health & Avoid Sudden Shutdowns
A weak or failing battery can cause unexpected shutdowns, which may lead to recovery mode issues if the device loses power during an update.
- Check your battery health under Settings > Battery > Battery Health & Charging. If it’s below 80% capacity, consider replacing it.
- Avoid letting your iPhone completely drain to 0% too often, as this can stress the battery and cause stability issues.
- If your iPhone randomly shuts down, it might indicate a hardware issue that needs professional repair.
7. Perform Regular Backups to Prevent Data Loss
Even with the best precautions, unexpected software failures can still occur. Regular backups ensure that your data is safe in case your iPhone needs a restore.
- Use iCloud Backup by going to Settings > [Your Name] > iCloud > iCloud Backup and enabling automatic backups.
- Alternatively, use iTunes or Finder to create local backups on your computer for extra security.
- If you suspect an issue, back up your data before performing any major updates or restores.
8. Be Cautious with Jailbreaking
Jailbreaking gives you more control over your iPhone but can also make it unstable, increasing the risk of software corruption and recovery mode loops.
- If you choose to jailbreak, use trusted sources and avoid installing unverified tweaks.
- Be prepared for potential system crashes that may require DFU mode restoration.
- If you experience frequent issues, consider removing the jailbreak and restoring your iPhone to factory settings.
9. Check for Hardware Issues
Although most recovery mode problems stem from software errors, hardware issues like damaged components can also trigger system failures.
- If your iPhone was recently dropped or exposed to water, recovery mode issues could be a symptom of internal damage.
- Inspect your charging port, motherboard, and battery for signs of wear, corrosion, or physical damage.
- If you suspect a hardware problem, take your device to an Apple Store or an authorized repair center for diagnostics.
10. Reset iPhone Settings if You Experience Frequent Issues
If your iPhone frequently experiences glitches or crashes, resetting settings can help clear any conflicting configurations.
- Go to Settings > General > Transfer or Reset iPhone > Reset > Reset All Settings.
- This will not delete your data but will reset network settings, privacy settings, and system preferences to default.
By taking proactive measures, you can prevent frustrating iPhone recovery mode issues and keep your device running smoothly. Regular updates, proper storage management, and cautious handling of software and hardware can significantly reduce the risk of getting stuck in recovery mode.
iPhone Ambient Light Sensor Not Responding? Here’s What You Can Do
If problems arise, knowing the right troubleshooting steps can save you time and prevent data loss. Stay informed, stay prepared, and ensure your iPhone recovery mode experience is never a nightmare again!
FAQs
Can I Use Recovery Mode to Fix a Disabled iPhone?
Yes, if your iPhone is disabled due to too many incorrect passcode attempts, recovery mode allows you to restore it. However, this will erase all data, so ensure you have a backup before proceeding.
Why Is My iPhone Stuck on the Recovery Mode Screen After an Update?
This can happen if the update was interrupted, the firmware is corrupted, or there was insufficient storage space. You may need to restore your iPhone using iTunes, Finder, or a third-party tool.
How Do I Fix an iPhone That Keeps Restarting in Recovery Mode?
If your iPhone keeps rebooting into recovery mode, try force restarting it. If that doesn’t work, update or restore your iPhone using iTunes or Finder. If the issue persists, DFU mode or professional repair may be needed.
What Happens If I Disconnect My iPhone During Recovery Mode?
If you unplug your iPhone while it’s restoring or updating in recovery mode, it could cause system corruption, leaving the device stuck in a boot loop or recovery mode again. Always let the process complete before disconnecting.
Does Recovery Mode Fix Boot Loop Issues?
Yes, recovery mode can help resolve boot loop problems caused by software glitches or failed updates. If recovery mode doesn’t work, DFU mode may be required for a deeper system restore.
Can Recovery Mode Help If My iPhone Won’t Turn On?
If your iPhone won’t turn on due to a software issue, recovery mode can often restore or update the device. However, if the problem is hardware-related (such as a dead battery or motherboard failure), recovery mode won’t help.
Will Using Recovery Mode Void My iPhone’s Warranty?
No, using recovery mode does not void your warranty. It’s an official Apple troubleshooting method. However, if you have jailbroken your iPhone, Apple may refuse service for software-related issues.
How Do I Know If My iPhone Is in Recovery Mode?
When your iPhone is in recovery mode, you’ll see a screen with a computer and cable icon (on newer models) or a “Connect to iTunes” message (on older models). The device won’t boot normally until you restore or update it.
Can I Back Up My iPhone in Recovery Mode?
No, you cannot back up your iPhone once it’s already in recovery mode. However, if you previously enabled iCloud Backup or backed up via iTunes/Finder, you can restore your data after exiting recovery mode.
How Can I Prevent My iPhone from Getting Stuck in Recovery Mode Again?
To avoid recovery mode issues, always ensure your iPhone has enough storage before updating, use a stable internet connection, keep your device fully charged, and avoid unauthorized software or faulty jailbreaks.